
It's been awhile since I posted and I am FINALLY getting around to writing the Deckers cosplay post. I am going to split up this post into 2 parts. This first post will focus on everything that is worn. The second post will only be about the Deckers' sword, the Nocturne.
My Deckers costume didn't follow one particular Decker. I just mixed and matched what I liked from other Deckers and made it my own. I primarily used this picture as a reference point. After the mixing and the matching was done, this is how I looked.

I guess I'll go from top to bottom.
~Headphones~
The headphones I bought for super cheap on Amazon.

I took the headphones apart and sanded off all of the paint. Using Illustrator, I created a star to use as a stencil and traced the shape on to the headphones. After priming and tracing the star, I masked out the star shape.

When I repeated the previous steps on the other side, I used my Dremel and cut out the star.

Since the headphones are black, I simply spray painted them black. Since the characters are Deckers and they have stuff that lights up, I went ahead an put in a blue LED on both sides. In the picture below, you can already see some blue in the outline of the star. What that is is simply a blue transparent file folder that I bought at Office Depot. I cutted out the proper shape, hotglued that in and glued on the star.

Both LEDs simply run off some AA batteries that I keep in my hoodie pocket. The wires I wrapped in black electrical tape to make it look like it was just simply the headphone cord. I also added a simple little switch on the inside of where the speakers are to turn things on and off.


~Hoodie~
The black hoodie is just a plain old hoodie that I bought from Old Navy. The glowing blue star and stripe are all EL lights from adafruit.
If you want to know specifically what I bought, then here:
2 Aqua colored EL tape Link
1 Aqua colored EL panel Link
In case you are wondering, both EL products were not hard to use at all! It was as simple as connecting things to batteries and connecting wires. The EL panel did require a separate inverter but thats really it. If you have never messed with any EL stuff before, the inverters do give off a 'eeeeeeeeeeee' sound when they are on. You really wouldn't hear it unless you were in a silent room. Since I cosplayed with 3 of my other friends and all of us had multiple inverters on us, it was a bit louder and kinda amusing. :p
Attaching the EL tape and the EL panel to the hoodie was rather time consuming. I didn't mind the process, but thats cause I have a lot of patience. On the edges of both the EL tapes and EL panel is a 1/4" border of clear plastic that is not vital. So what I did was grab a hand-sewing needle and hammered in a bunch of holes all along the edges, as you can see below.
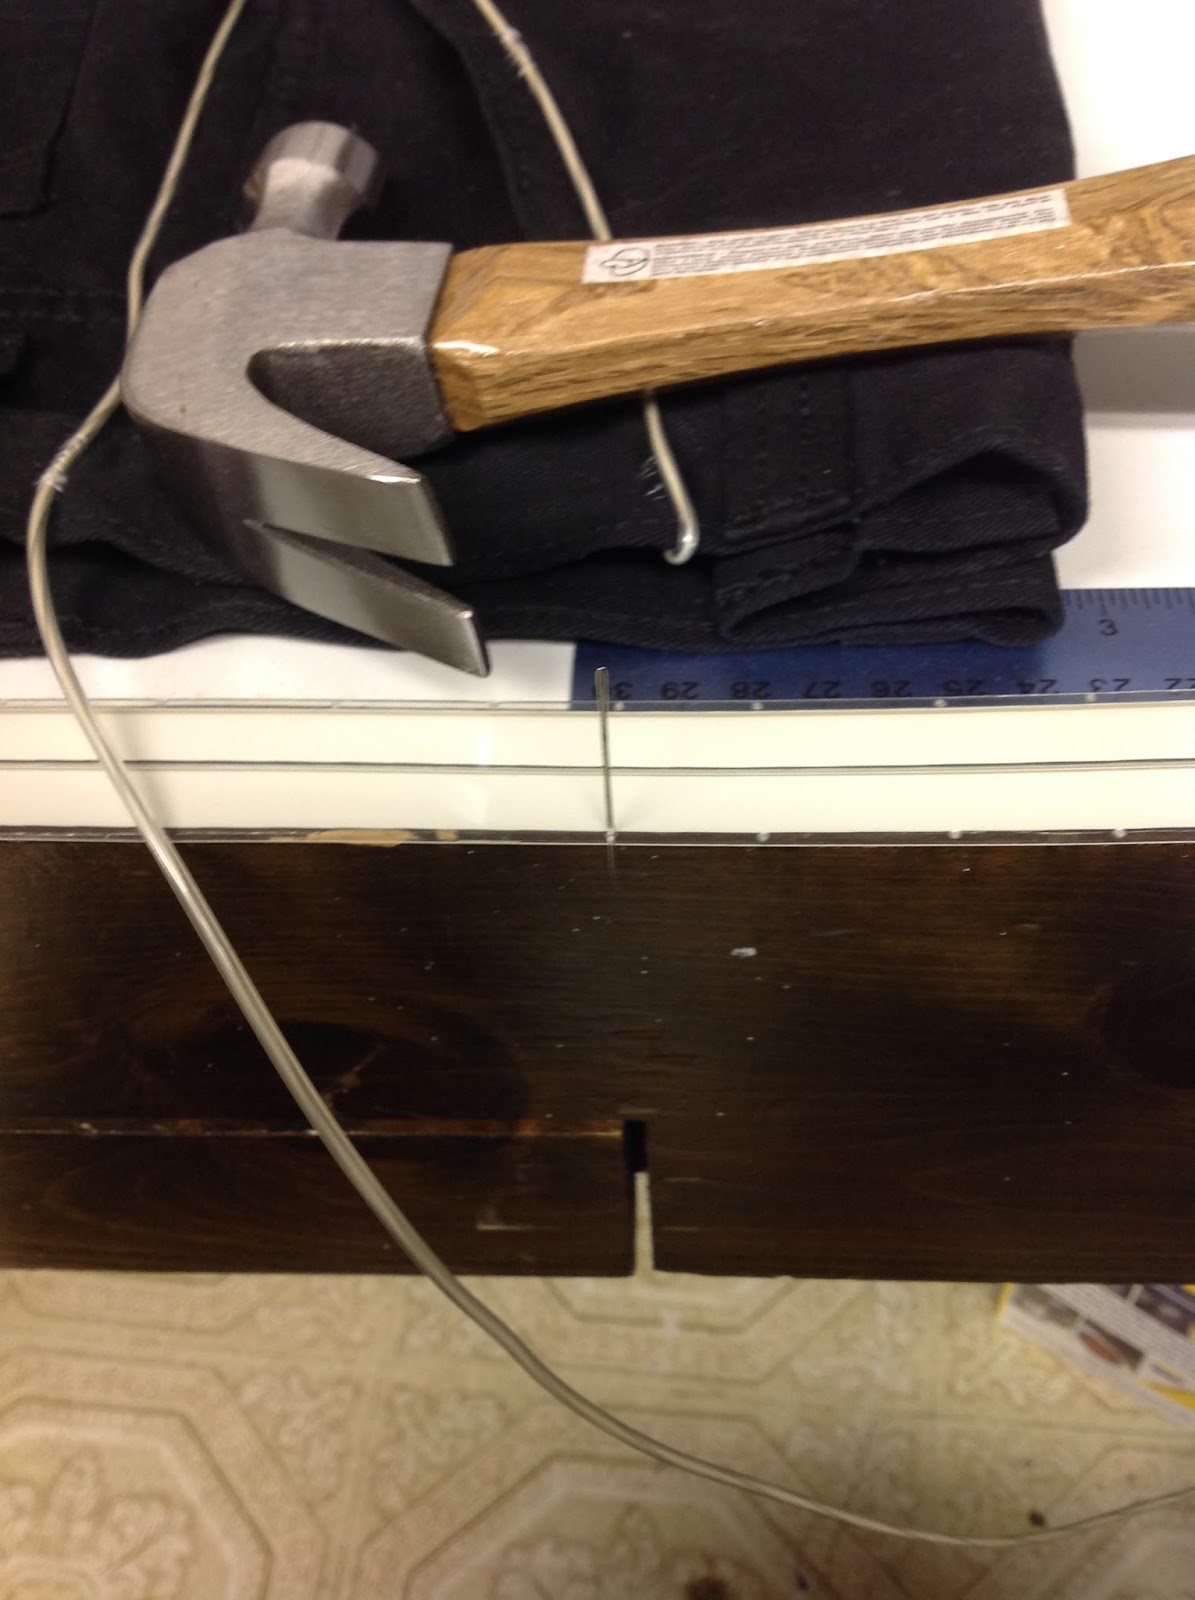
Why did I go that route you ask? Cause I found clear thread at Joann's and used that to hand-sewed both EL tapes and EL panel on to the hoodie. Did I mention that I'm a patient person??
What I used the EL panel for was the glowing star. It may look complicated, but trust me it wasn't. The great thing about the EL panel is you can actually cut the panel! As long as you do not cut off the connection to the panel, things will be fine. What I did was like the star on the headphones. Created and sized out a proper looking star in Illustrator and used that as a pattern on the EL panel. I took scissors to cut off what isn't needed and used black electrical tape to mask out the rest of the panel. The battery packs for the EL tapes and EL panel were in both pockets of the hoodie. Here's how it looked when finished.


~Shorts~
The shorts were simple enough, though I put in some unnecessary work. Bought a pair of cheap cargo pants and made them shorts........Yeah. I know. I didn't realize I could of just bought shorts instead of cutting pants into shorts until I was done. :p :p The glowing lines on the side of the shorts is just blue EL wire that is also from adafruit. Here. I also used the clear thread here to attach the EL wire to the shorts. I positioned the EL wire in a specific way to make sure I can put the battery pack into the pockets of the shorts.

~Shoes~
Lastly are the shoes. They are nothing special, cheap skater shoes from Target. I did buy some black laces to swap with the white laces that originally came on the shoes. The lights you see on the bottom of the shoes is an LED light strip from Amazon. Here. For the price, you would think they be extremely crappy, but actually no. The LEDs are nice and bright! I will say that the wire that runs from LED to LED is very thin! My friend also bought these to light up his shoes and his kept breaking but I didn't have that problem so if you do buy them, be cautious. I used clear silicone adhesive to attach the LED strip to the bottom of the shoes. As for the LED strip battery pack, I wrapped that in black electrical tape and put it in between the laces and the tongue of the shoe.


Thats basically it....I think. Theres so many pieces to this costume. I probably forgot a piece or two. If you want to see more Deckers pictures you can visit my friends cosplay website here and a gallery of a private photoshoot that we did here!
If you have any questions about how I made something, feel free to ask! This wraps the clothing side of the Deckers cosplay, next will be a post on the Deckers' sword, the Nocturne. I'm hoping that goes up fairly quickly.... Until my next post, HAPPY CRAFTING!!
Follow me on
